Importing data
On this page (3)
Importing data can be helpful in case the data is generated externally in bulk. Typical examples include large laboratory test panels that can be provided electronically by the lab or data generated by medical devices. Now, instead of transcribing the data manually, you can import it into the system which is a lot less error prone.
Data can be imported at any time during the recruiting process. You can find the import menu at Data & Analysis → Import. In order to import data, a few prerequisites must be fulfilled:
- All target fields you want to import into must exist in a regular form in your study just as for manually entered data.
- The codebook of all target fields must be filled in – i.e. they have a variable name and variable coding (for some data types).
- You must have the necessary permissions for the import:
- import permission
- edit permission for all study sites you want to import to
- The import file adheres to the required format.
Import Data Format
Import files must be in CSV format using a semicolon (;) as a field
separator. The first row of the file contains the column headers. There are a
few mandatory columns that are needed to correctly identify the participant,
visit and form for the data.
| Column | Description |
|---|---|
participant_identifier |
participant identifier as configured for your study. E.g. B_57, 00207 or C1_XL3J5SD |
center_name |
Name of the study center |
visit_name |
Name of the visit |
finished_at |
Optional: if set to an ISO date or datetime, the form(s) you import into will be set to finished, otherwise they remain in their current state (probably started) |
diary_date |
Only for participant diaries: date of the entry |
form_index |
Only for added forms. Numerical index (1, 2, ...) |
All columns that follow these required columns must use the correct variable name in the header row and the correct data format in the data rows. Do not leave data fields empty – the behavior of the importer with respect to empty fields is officially undefined and may change in the future.
Caution: Dates must be given in ISO-8601 format (YYYY-MM-DD, e.g.
2024-10-12) or as datetimes using universal time (YYYY-MM-DDThh:mm:ss.sssZ,
e.g. 2024-10-12T09:33:55.151Z).
You can download file templates of your forms in the import dialog. The first row of these templates contain all required columns and all data fields of the form with a valid codebook entry. The second and third row in the template are for your information and contain the original question text and the expected data format of the respective columns, respectively. These to rows must be removed before upload. You can just copy&paste your data into these templates and then upload them.
You can combine data from different forms in the same import file – the system uses the variable names in the header row to identify the location of the data field.
Importing data will not set the respective forms to finished, by default. If
you want that to happen, you need to include a column named finished_at and
provide a date or datetime in it. The importer will then set all forms to
finished that it imports data into.
Starting the import
Once your data file is ready, go to data & analysis → Import and click the Upload button. Select your import file in the file selection form and press OK. The system will check uploaded files and show error messages if it cannot find a variable name or encounters incorrect data formats or data coding. If the pre-check passes, you will be shown a preview table that indicated all changes the system will make upon import. If you select Import, The import starts.
By default, you can only import data into existing participants and get an error message if the importer encounters a non-existing participant identifier. However, if you select Create missing participants in the import dialog, the system will automatically create a new participant when an unused id is found.
Import actions are documented in the audit trail under the name of the user starting the import.
Example
LEt's say we have a small form covering some cardiovascular parameters:
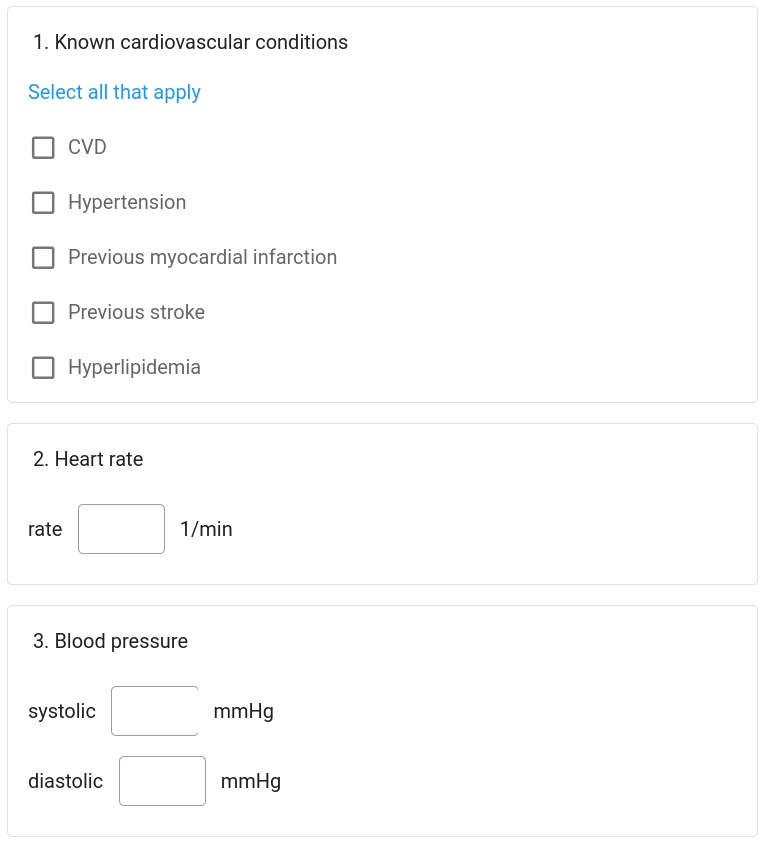
If we want to import all data into this form, we first fill in the codebook:
| Question | Field | variable name |
|---|---|---|
| Q1 Cardiovascular conditions | CVD | cvd |
| Hypertension | hypertension |
|
| Myocardial Infarction | MI |
|
| Stroke | stroke |
|
| Hyperlipidemia | hyperlip |
|
| Q2 Heart rate | rate | heartrate |
| Q3 Blood pressure | systolic | rr_sys |
| diastolic | rr_dia |
Now we can go to the Import menu and download the template for this form:
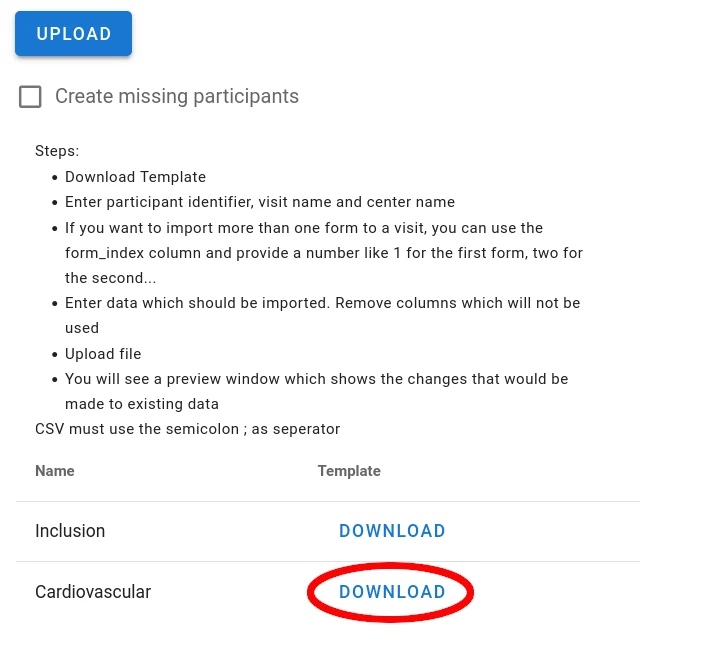
The resulting CSV file contains the standard columns described above and all your data columns as defined by the codebook variables. For the Multiple-Choice question options, you will get the full text and the variable coding in rows 2 and 3. E.g.:
cvd
Known cardiovascular conditions
1 = CVD, 0 = not checked
or
hypertension
Known cardiovascular conditions
1 = Hypertension, 0 = not checked
For the numeric fields, the hint is simple:
heartrate
Heart rate
rate = number
So now we know how to fill in the table. E.g.:
participant_identifier visit_name center_name ... stroke hyperlip heartrate rr_sys rr_dia
B_378                  Inclusion  Berlin      ... 1      0        72        140    95
M_123                  Inclusion  Munich      ... 0      0        61        130    85
L_423                  Inclusion  London      ... 0      1        68        160    90
Save the file in CSV format (with semicolon separators) and you can now import it by clicking the Upload button on the import page. If you selected Create missing participants, they are generated automatically and the preview window will tell you so:
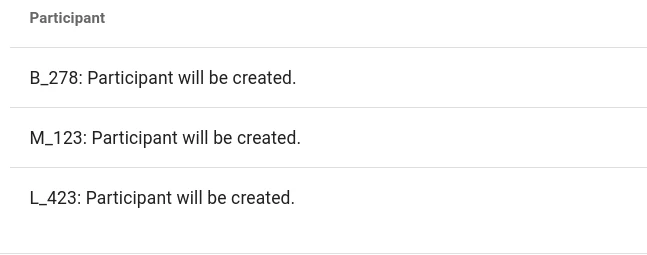
After the import, the new participants are now available and the respective form contains all data from the file.
Questions about Magana Trial Manager?
Try setting up your own eCRF in a free test account, or reach out to our team in Regensburg — we usually reply within one business day.